
Flight Manager
The Schedule Builder is a window where all the details of the Proposal/Booking are entered. To access this, double click on the station or click on the camera icon. The first thing to do is to select a flight date for the campaign.
Click on the Flight Manager button, near the top left corner of the window.
Select the desired Start and End date of the flight from the Flight Manager Window and click Add.
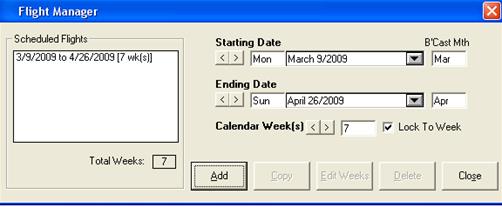
Once the flight is added, it will be displayed in the Schedule Flights window. Multiple flights may be added by simply selecting another flight and clicking Add, once again.
If you were to change the start date with Lock to Week selected, the end date will also change. If it is not on, the end date will remain the same. For example, if there is a three week flight and you change the start date, the new end date will follow.
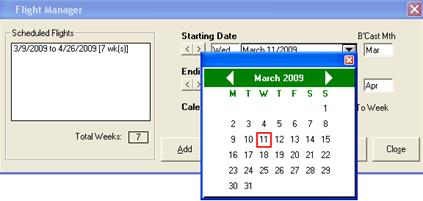
By default, the Start and End date are in Broadcast weeks (Monday to Sunday), however Mid-Week Start and End date may also be used by using the drop down menu. By clicking on the drop down menu, a calendar will pop up allowing the user to select a specific date. Please note that if the flight period is a mid-week start/end date, the placement rules on the line will not be enabled.
Once the flight has been added, click Close. The system will then retrieve a program listing of all available inventory for the selected flight.
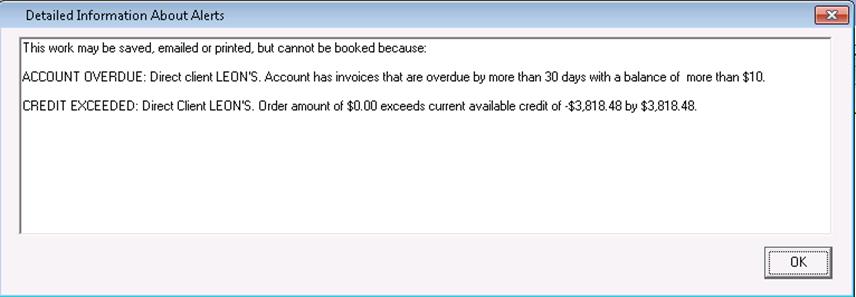
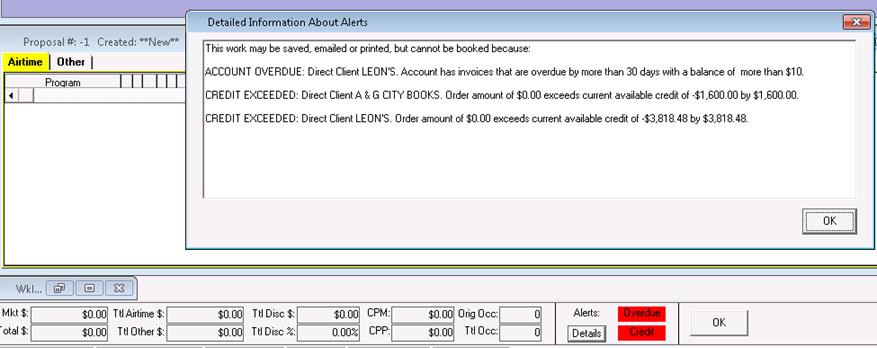
If the advertiser chosen in the Header has exceeded their credit limit, you will notice immediately at the bottom of the screen additional information in red. Click on the details button to view

The message that was indicated in the Header is repeated, with an additional note indicating that the work may be save, printed or emailed, but cannot be booked
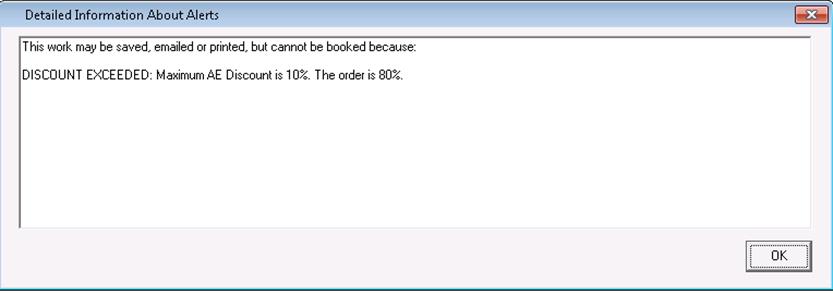
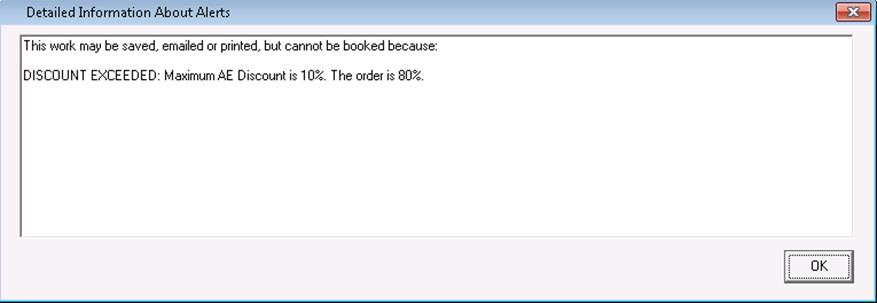
If the AE attempts to exceed their allowable discount, there will be an alert at the bottom of the schedule builder indicating as such

Click on the Details button for more information. The amount of the exceeded discount will appear in the window
Building a Proposal for Participating Dealers
A Participating Dealer is used when a group of advertisers get together and share a part of the advertising. Once the contract has been entered, the dollars will be split evenly amongst each of the participating clients, based on the shares that are given to them. To set up a Participating Dealer contract in Sales, follow these steps.
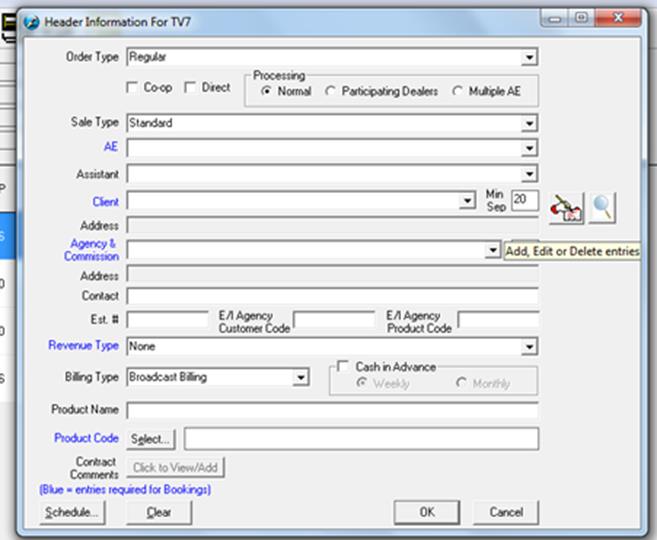
In the Header Information screen, you must first set up an “Umbrella Advertiser” to be able to link the advertisers together. To do this, click on the client name field – an icon to the right of the field will appear to Add, Edit or Delete entries:
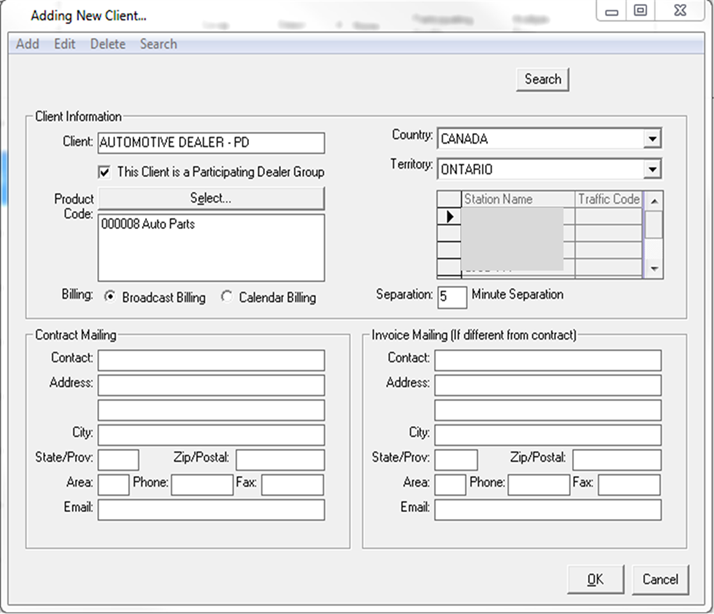
Once the screen appears, click on “Add” at the top and all of the fields will open up. In the ‘Client’ field, type in what the umbrella advertiser is. In the example below, it will be a group of Auto Dealerships. Check mark the option “This Client is a Participating Dealer Group.’ Choose the product code, whether it will be Broadcast or Calendar billing, and choose the Country and Territory (for tax purposes). Once all information has been filled out, click the Ok button.
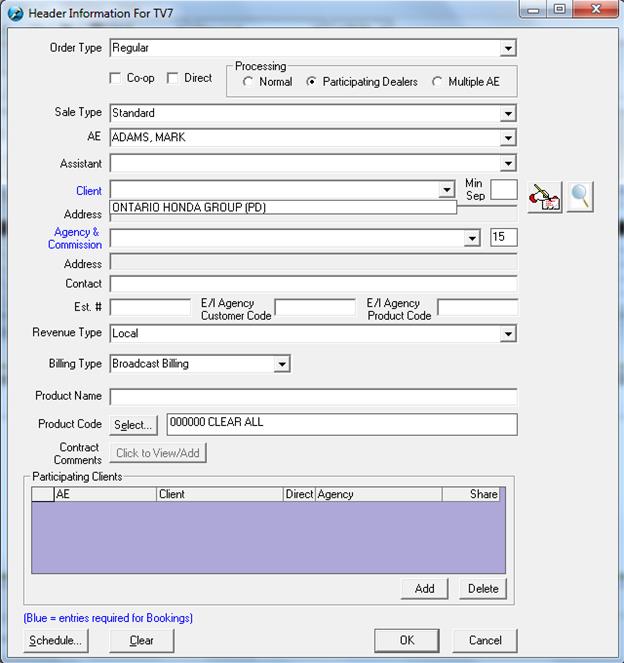
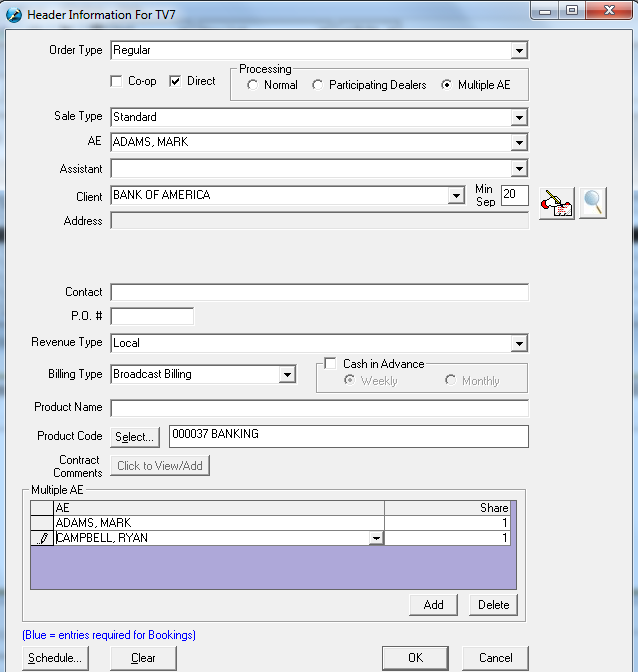
On the Header screen, choose Participating Dealer – once this is done, a list of the umbrella clients set up as participating dealers will appear in the client drop down. Choose the one newly created from the list
![]()
![]()
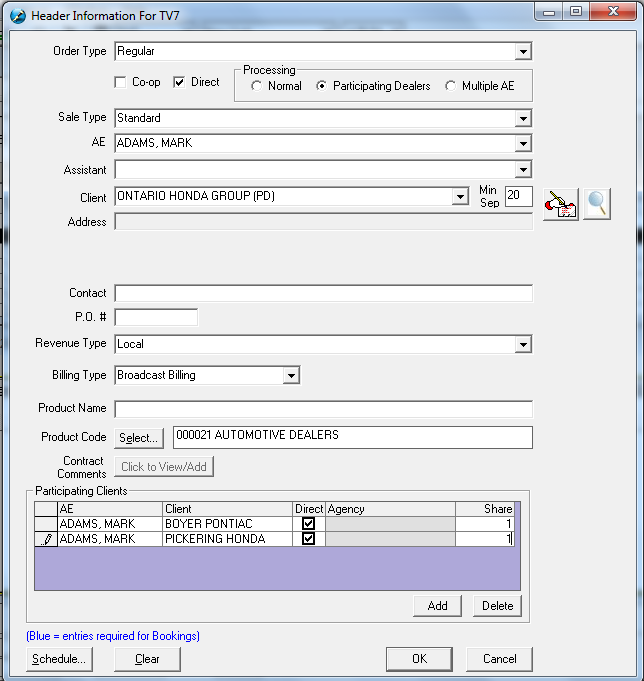
Fill
out all other information as required. The next step is to add the
Participating Clients. To do this, simply click on the Add button, and
choose the advertisers from the client drop down. Add in the shares for
each advertiser. The screen will look similar to the following. Once
all clients have been entered, click on the Ok button. Continue to build
the contract, as you would normally do, and follow the normal booking
procedures.
If one or more of the advertisers has exceeded their credit limit, the alerts will appear at the bottom of the schedule builder. Click on the Details button for more information
Building a Proposal for Multiple Reps
If one or more of the Account Executives has exceeded their discount, a message will appear within the schedule builder, indicating as such. However, the AE that has exceeded the discount will not appear
Program Listing and Avails
Once a flight has been selected, the system will retrieve the program listing.
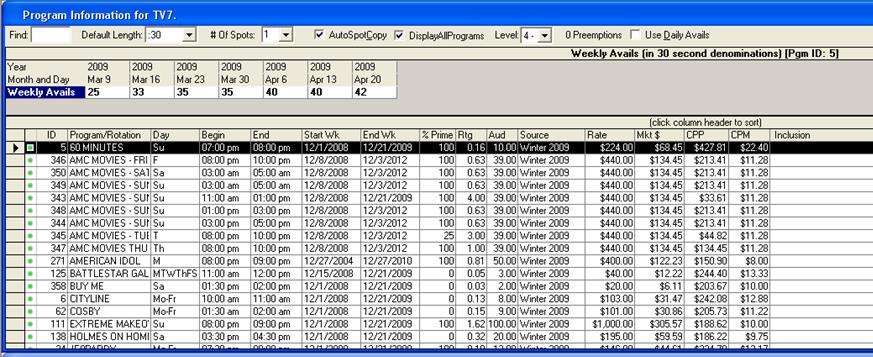
From the listing, the user can view the details of each Program/Rotation such as: Days on air, Begin/End Time, Start Week & End Week, % Prime, Ratings, Audience, Source, Rate, Market $, CPP, and CPM.
Depending on how many active Audience Tables (Rate Cards) are imported into the system by Research, users may see duplicate programs. To verify the different Audience Tables (Rate Cards), the name of the Audience Tables are listed in the Source column.
For SDS Sales systems that are connected to SDS Traffic, users may also view the Avails of each Program/Rotation. Every time a Program/Rotation is selected, the system will refresh and give an estimated number of Avails based on the length and priority level of the sort selected for each week of the flight.
By selecting Use Daily Avails from the Schedule Builder window, the user may also view the Avails by day.
