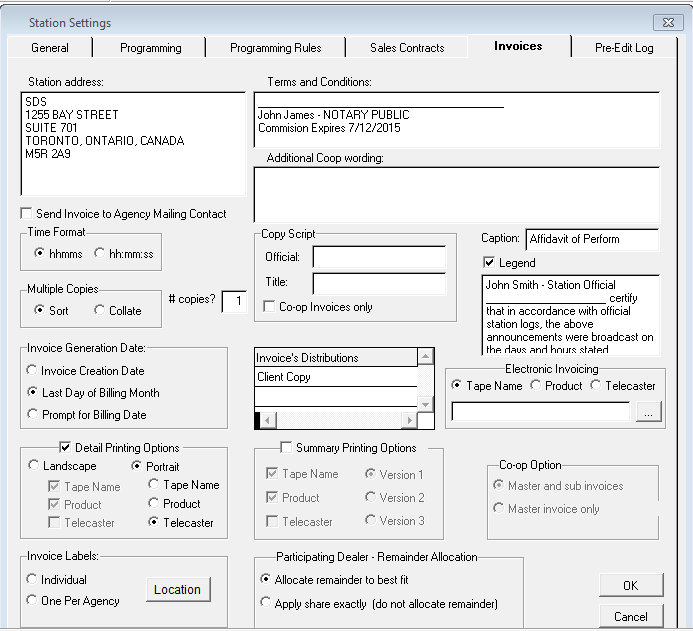
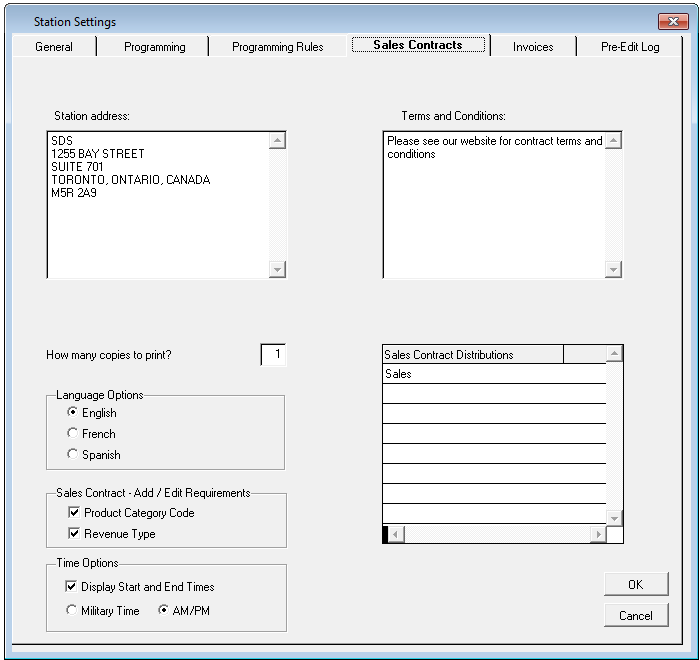
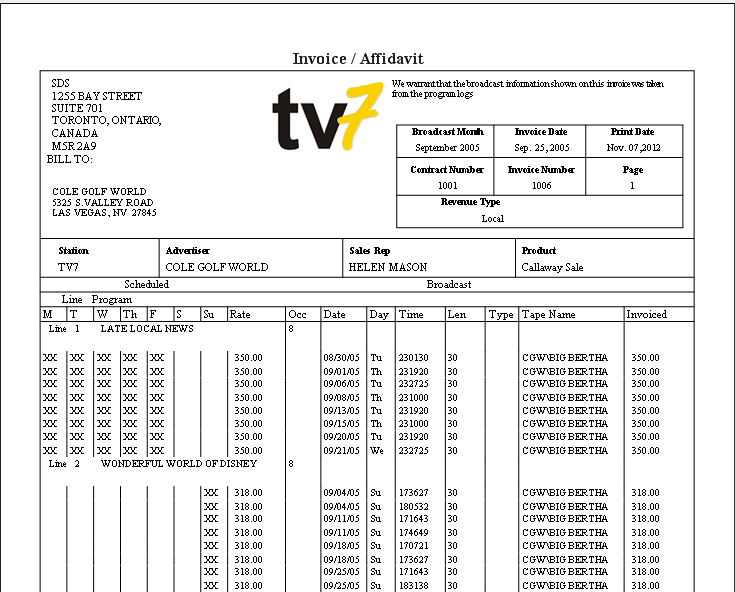
Station Address - this is the Station address that will appear on each invoice printout
Legend – This allows you to put a legend on the invoice to describe anything that’s required. It can be used to describe make goods, pre-emptions, credits, debits, etc.
Caption – This is an area for any other additional information that needs to appear on the invoice. In the example above, “Affidavit of Performance” has been entered
Time Format – indicates how the time will appear on the invoice (if there are colons separating the hour, minute, and second)
Copy Script – Official and Title Fields – this field is in place to add the name of the person who will sign off on the “copy script” and what their title is
How many copies to print - default for the number of invoices to print
Terms and Conditions - these will appear on each printout on the bottom of the invoice
Additional Co-op Wording – place any additional wording that needs to appear on the Co-op invoice at the time of printing
Co-op Invoices only – co-op scripts will only print if co-op is selected on the contract.
Invoice Distributions - for each copy of the invoice a different distributor can be set to receive a copy. Example: Agency copy, Distributor copy. This becomes active if the number is greater than 1
Multiple Copies - if multiple copies are to be printed of the Invoices, the Sort and Collate options determines the printing order for the Invoices.
Invoice Generation Date - this is the date that will display on Invoices once they are generated. The Invoice Creation date will display the date the Invoices were generated. The Monday of the Next Broadcast month will display the Monday date of the following Broadcast month. Last Sunday of the Invoiced Month will display just that. There is also an option to Prompt for the Billing Date. When generating the invoice, you will then at that point be able to choose between the Invoice Creation Date or the Last Day of Billing Month.
Detail Printing Options – Landscape or Portrait – If the Landscape option is selected, Tape Name and Product can be chosen, or Tape Name and Telecaster. When Portrait is selected, only one can be chosen – Tape Name, Product, or Telecaster. When choosing the Detail option, if there are comments on the line of the contract, they will print.
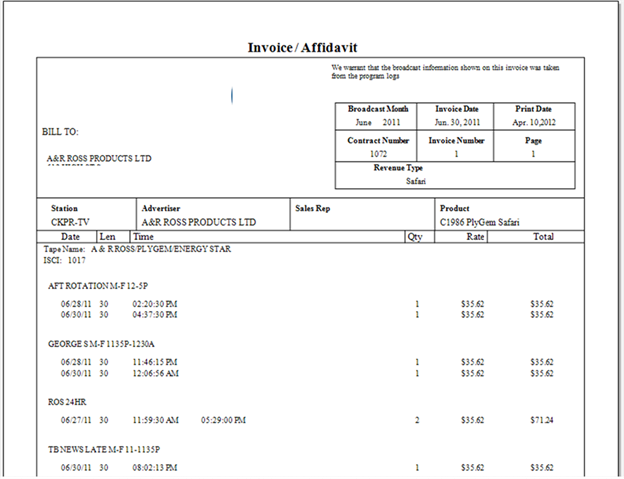
Example of Detail option where Portrait, Tape Name is chosen:

Summary Printing Options - There are three options to choose from.
The first two Invoice Options are quite similar, the only real difference being that in Version 1 Rate is grouped prior to Date, whereas in Version 2, Date comes prior to Rate.
In version 3, the primary grouping is the Booking Code (Daypart, ROS, Feature, etc.), then date, length, etc.
They all sort by tape name (Copy/Creative title) as their primary first. Also included on the invoice is the Revenue Type.
*Please note that when choosing any of the summary options, line comments or Credits will not be printed on the invoice
Invoice Option #1 – shows the Tape Name (or Telecaster), date, length, times that the spot(s) ran, the amount of spots, the rate, and the total.
Invoice Option #2 – shows the Tape Name, date, length, sales group/rotation name, time the spot(s) ran, amount of spots, rate, and total

Invoice Option #3 – shows the Tape Name, the sales group/rotation name, the date, length and where each spot ran on a separate line, amount of spots, rate, and total
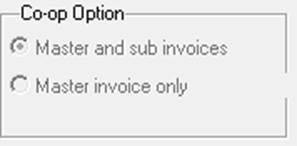
Co-Op Option – Master and Sub Invoices or Master invoice only – This allows for different options when printing out Co-op invoices. You can simply print the main invoice only which shows all pieces of creative on one page (Master Invoice only) and then the scripts OR you can print the master invoice and then each piece of creative on their own invoice and the scripts that go along with them (Master and sub invoices).
Electronic Invoicing – if Electronic Invoicing is set up, you can choose whether the Tape Name, Product, or Telecaster displays on the invoice. It is also possible to set a path when the electronic invoice has been generated, to go to a specific holding area for one or many users. Click on the box beside the empty field.
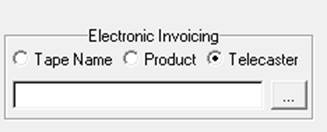
It will default to the SDS BMS folder – from here, choose the station where you would like to place the files. In the root of the station, you can create a folder labeled “Electronic Invoicing” (do this before accessing this area of the system). Once the folder has been selected, click on the Ok button and the path will be set.
Invoice Labels – Individual or One Per Agency – address labels that will print out in conjunction with the invoices. Clicking on “File Location” allows for the ability to save a pre-made label
Participating Dealer – Remainder Allocation – There are two choices: to “Allocate the remainder to best fit” or to “Apply share exactly (do not allocate remainder)” This refers to the dollars/share of the participating dealers and how they are divvied between all advertisers