There is a new option in Sales Contracts, which allows for modifying the weekly Spot Pattern, when the Daily Spot Allocation feature is NOT selected. If DSA is selected, you will not be able to use this feature.
To access this option, right-click in the SPW (Spots Per Week) field, and select the option: Modify Pattern:
When this option is selected, the following screen will pop-up, displaying the current daily allocation for the spots:
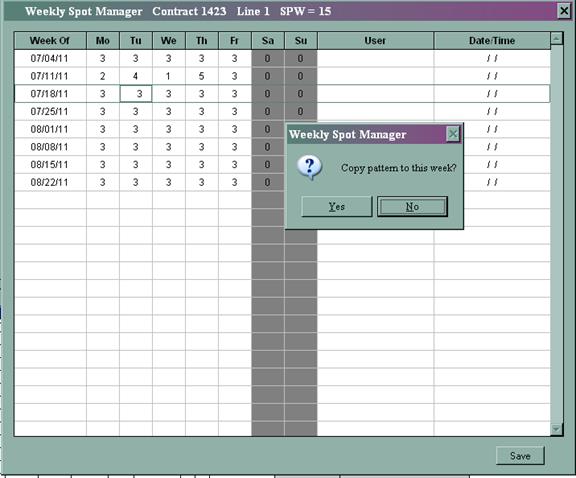
To redistribute the spots in future weeks, you can simply edit the # of spots within the days. Once you have selected the new pattern, the system will ask whether you want to copy the new pattern to the following week. If you select yes, the pattern will be copied to the following week. If you select No, the existing pattern will remain. To save your changes, click the ‘Save’ button at the bottom right of the screen.
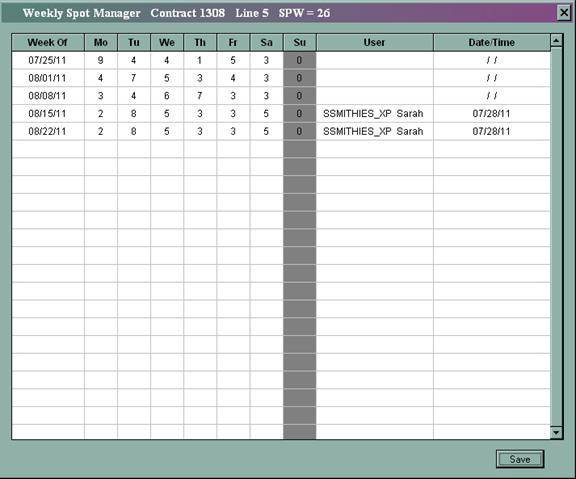
When the new pattern is saved and recalled, the computer name and username of the user who edited it, along with the date of the edit will display

Time Editing
There is an option when entering lines on a contract to “time tighten” the rotations, sales groups, and programs.
Right click in either the Start or End Time fields to edit the times.
The Time Editing option will appear, and the following screen will pop-up:
In this screen, you will see the original times in the top windows, and will have a chance to edit the times in the bottom windows. Simply check mark the edit option, then edit the times in the fields. When you have finished selecting your Start and End times, click the ‘Apply’ button.. To Exit without changes either ‘uncheck’ the Edit option, or click on the Red ‘X’ to Exit without apply the changes.
Once you Apply the new start and End times and Apply your changes, the edited times will appear on the contract line.

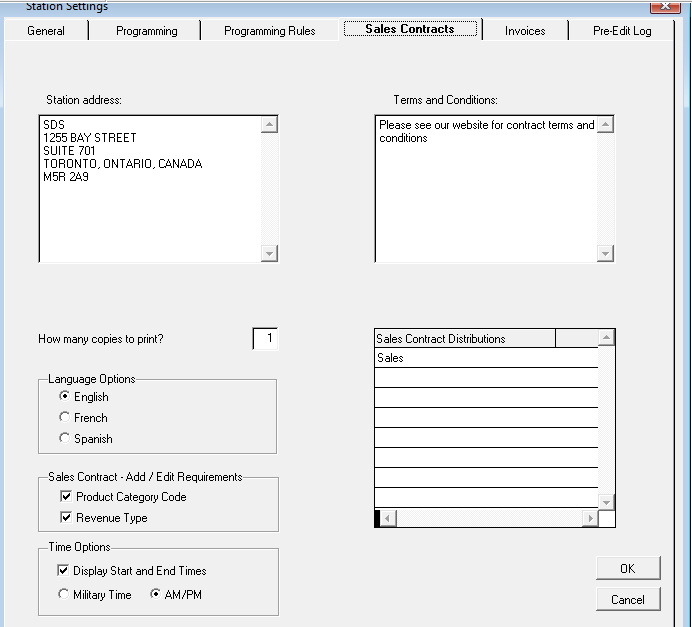
To ensure that the Start and End times print on the Sales Contracts, click on File, System Configuration, and select Network Settings. On the Sales Contracts tab, there is an option for Time Options. Check mark “Display Start and End Times” and choose whether the time will be displayed as Military Time (a 24 hour clock) or as AM/PM. For multiple station set-ups, this option will need to be selected on each station.
![]()

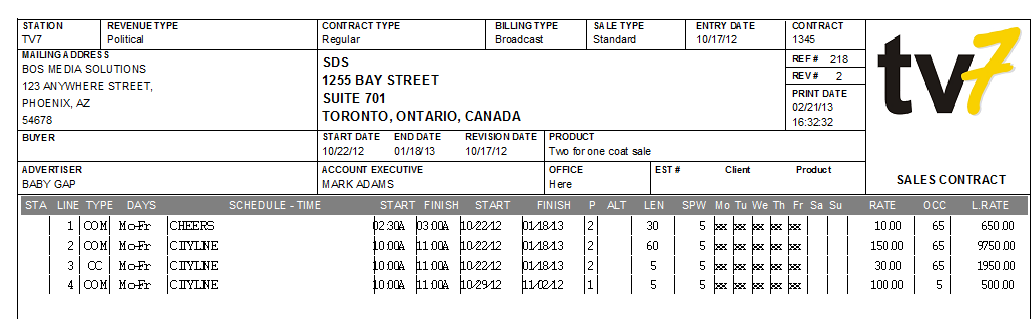
The Start and End times will appear as below on the Sales Contract printout:
![]()

Booking PGR and PGI Contracts
Booking PGR and PGI line type contracts can be done like any other contracts through SDS Traffic or via Symphony. PGR and PGI’s are handled as separate line types containing their own set of rules and properties, which will be discussed below. SDS allows for entry of PGR (Programming) and PGI (Infomercial Programs) in order to be billed. Instead of simply entering a billing line, the system allows for a detailed invoice to be generated that indicates the date and time that each episode aired. However, there is a rule that applies. The spots per week (SPW) must equal the days on air (DOA).
When booking infomercials, the process starts in Programming-Scheduling.
Once the spots are scheduled the research administrator adds
new lines into the SDS\Proposal’s system audience table from Data - Edit,
ensuring that the Days on Air, Start Time, End Time, Start Week, End Week,
Traffic ID exactly match the parameters in Programming as to how it was
scheduled.
Once all lines have been entered on the contract, click the Save button at the top of the screen. The system will generate the gross total – click Ok if the total is correct; click Cancel if the rates or number of spots/lines need to be changed
Click Yes to print the contract
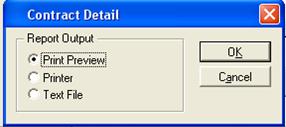
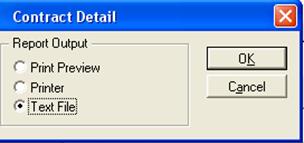
Choose from the printing options
Print Preview – will generate a printout on the screen

Printer – will send it directly to the printer
Text File - will be prompted to save it to a pre-defined directory

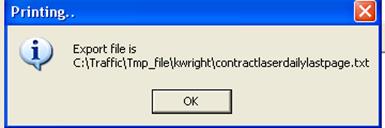
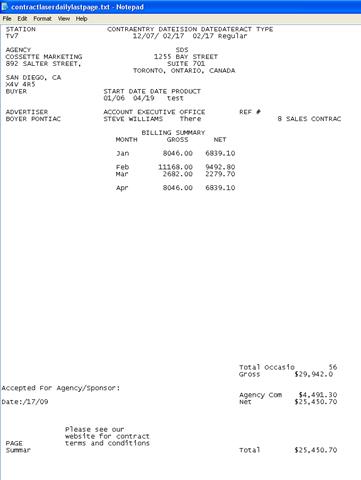
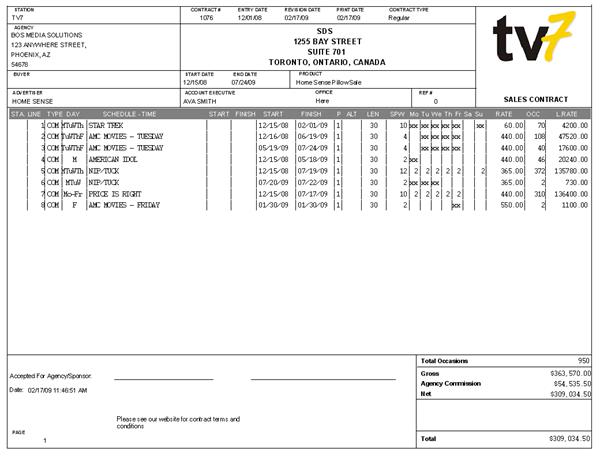
Follow the path that is given and open up the contract. Below is an example of what the text file will look like
Click Yes to email the contract to a recipient
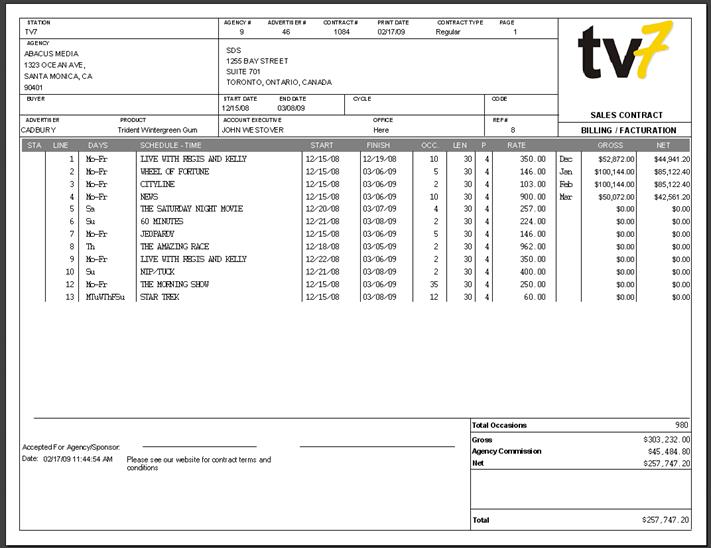
Before clicking “Yes” to this option. Below is an example of what the file will look like when opened in a browser
To enter multiple contracts, repeat the above steps. To exit the Sales Contract entry screen click on the Exit icon
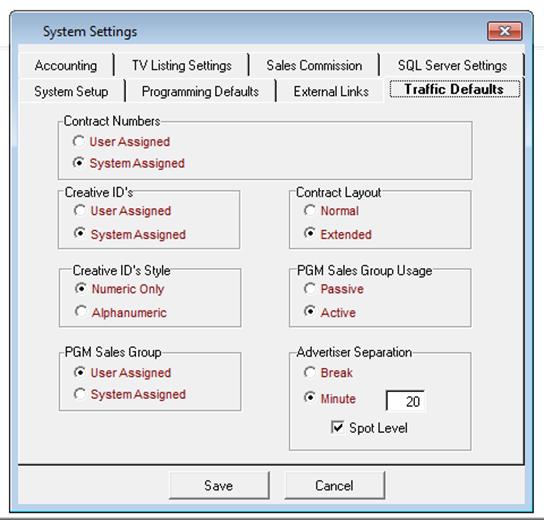
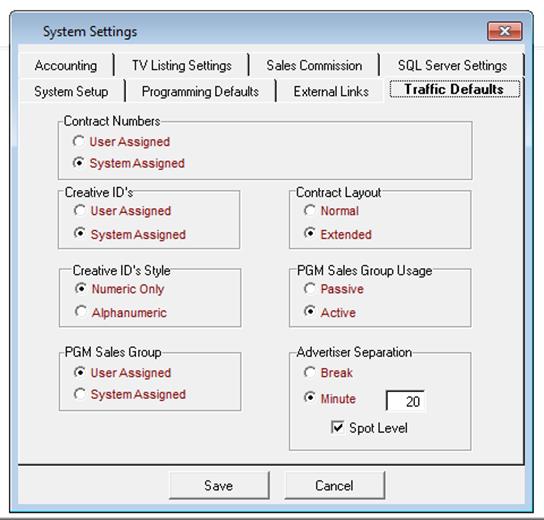
Note – to print the Daily Spot allocation ensure the setting for Extended is selected from within the File->System Configuration -> System Settings -> Traffic Defaults Tab under the Contract Layout options. The screen is displayed below:
![]()
Example of Contract when Normal is selected

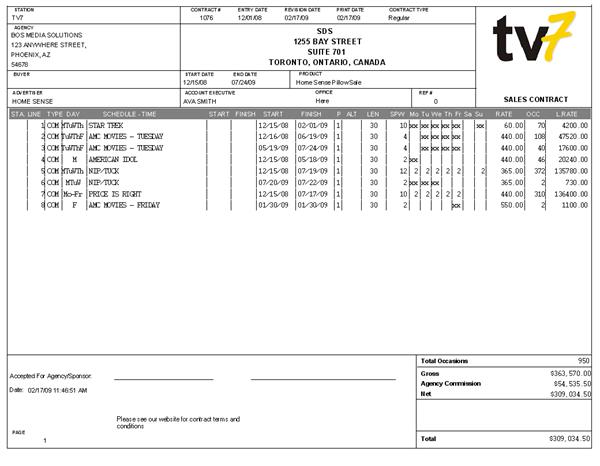
Example of Contract when Extended is selected – more fields appear on the printout